When you set up an exhibition booth at a major trade show or host a product launch, every physical piece in your space speaks volumes about your brand’s standards. Oversized props, backlit logos, and custom product docks grab attention instantly on a crowded floor. But as soon as visitors step closer, those displays need to withstand close scrutiny.
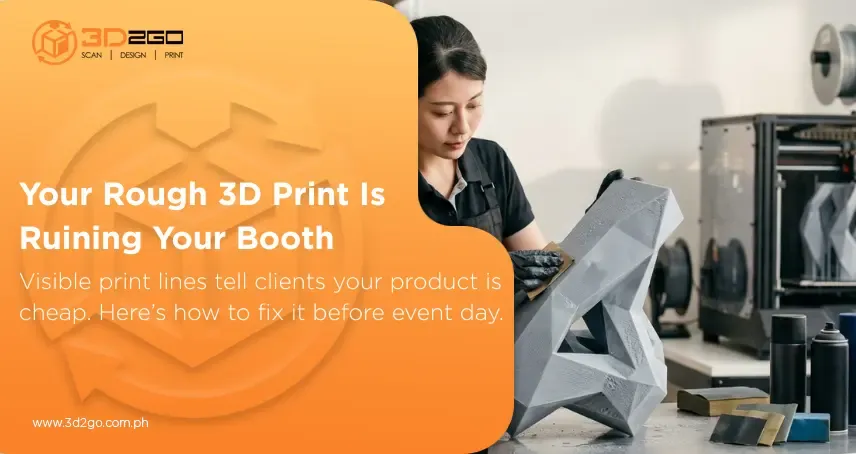
Fresh off the build plate, raw plastic prints show visible layer lines, minor print seams, and tiny ridges. That unfinished look might pass in an R&D lab for early functional prototypes, but commercial event props need a smooth, retail-grade surface. Investing in professional custom 3D-printed display finishing bridges that gap between raw plastic wire and sleek, booth-ready fixtures. The right post-processing techniques turn raw prints into professional 3D-printed displays that elevate your entire brand presentation.
Why Surface Quality Matters at Business Events
First impressions happen in a flash on a busy expo floor. Most attendees won’t know the technical ins and outs of 3D printing, but they will instantly notice rough textures, patchy paint, or visible print lines on a featured prop.
Relying on unfinished or poorly smoothed props creates obvious headaches:
- Unprofessional Visual Impression: Rough layer lines and visible print seams make corporate signage look rushed or incomplete under bright convention hall lights.
- Lighting Artifacts & Glare: Unfinished plastic ridges catch overhead spotlights unevenly, casting weird shadows across your logos and messaging.
- Dust & Dirt Accumulation: Raw, textured plastic surfaces trap dust and fingerprints during transport, making props hard to wipe clean during multi-day events.
Upgrading your prep workflow to build professional 3D-printed displays fixes these flaws, making sure your physical assets look crisp, clean, and photo-ready.
Research shows that corporate decision-makers judge an exhibition booth’s physical design and finish as a direct indicator of a company’s product reliability and market standing. High-quality surface treatment on professional 3D-printed displays protects your marketing investment by backing up your premium image.
5 Essential Steps for a Premium Display Finish
Getting a glass-smooth finish on large plastic prints takes a disciplined, hands-on post-processing routine. Here is how skilled technicians convert raw thermoplastic shells into event-ready assets:
1. Support Removal and Surface Prep
Complex prints rely on temporary support structures to hold up overhanging curves and hollow sections during printing. Technicians carefully clip them away with flush cutters and pliers, then immediately smooth down tiny contact nubs to keep the outer shell intact.
2. Progressive Wet Sanding
Sanding levels out layer ridges. Technicians start with coarse 120-grit paper to knock down high spots, then gradually work up through 240, 400, and 800-grit papers. Wet sanding is key here because water flushes away fine plastic dust and keeps friction heat from melting the plastic.
3. Gap Filling and High-Build Priming
Even after careful sanding, tiny micro-gaps between print layers usually stick around. Technicians apply specialized body filler or spot putty over seams and print joins. Once dry, technicians spray several coats of high-build automotive primer over the entire piece to seal micro-pores and create a smooth grey canvas.
4. Color Matching & Spray Application
Once the primed surface is sanded completely flat, it is ready for paint. To keep branding exact, technicians use professional spray gear to lay down heavy-duty liquid paints matched to exact Pantone or RAL color codes. Multiple thin coats prevent runs and deliver vibrant, streak-free color across large, professional 3D-printed displays.
5. Protective Topcoats & Clear Sealants
Event props take a beating during transit, packing, and setup. A final clear topcoat seals in the color and protects it from UV fading, scratches, and smudges. Depending on your design goals, you can go with matte, satin, high-gloss, or metallic clear coats.
This step-by-step approach ensures your 3D-printed displays look like manufactured commercial products, not quick plastic prints.
Raw Prints vs. Professionally Finished Displays
When deciding how to prepare your props, compare raw builds with fully finished pieces to see the value of expert post-processing.
Raw, unfinished prints show distinct layer ridges and rough support marks that catch dirt easily and look unrefined under venue spotlights. Basic sanded prints soften those lines, but tiny gaps and seams stay visible up close, often making paint look blotchy or dull. Fully finished professional 3D-printed displays deliver a smooth, pore-free surface with rich, Pantone-matched color and protective clear sealants. They reflect light evenly, handle heavy use, and give your booth a high-end commercial polish.
Smart Engineering Tips for Smoother Finishes
Post-processing starts long before the print bed heats up. Making smart design choices during the CAD modeling stage makes finishing faster and cleaner:
- Orient Files for Smooth Surfaces: Position key visual faces vertically or at steep angles on the build plate to reduce step-layering on visible curves.
- Hide Seam Lines in the Design: When splitting large props into smaller interlocking pieces, place joint lines along natural design seams or flat back edges where they are easy to fill and hide.
- Use Filleted Edges: Rounded corners and smooth fillets sand much easier than sharp 90-degree internal joints, preventing paint from pooling in tight spots.
Using these simple engineering tricks during design saves hours of hand sanding and produces cleaner, professional 3D-printed displays.
Build Flawless Event Displays with 3D2GoPH
Your trade show booth reflects your company’s standards, credibility, and attention to detail. Rough, unfinished props or quick paint jobs can weaken your brand impact and distract visitors from your core message.
3D2GoPH crafts high-impact, professional 3D-printed displays for trade shows, corporate galas, and retail brand activations. As the Philippines’ leading end-to-end 3D technology provider, we manage every step of fabrication under one roof—from initial 3D CAD modeling and high-resolution printing to expert wet sanding, gap filling, custom Pantone spray painting, and protective top-coating. Whether you need an oversized product model, a backlit logo, or custom display docks, our team delivers durable, flawlessly finished props built to stand out.
Don’t let unfinished props compromise your brand presentation. Contact our team today to start building your custom, venue-ready event displays!
Frequently Asked Questions About Custom Event Displays
Why shouldn’t you dry-sand plastic 3D prints?
Dry sanding plastic quickly generates friction heat. That heat softens or melts thermoplastics like PLA, causing the material to gum up your sandpaper and leave deep scratches instead of a smooth surface.
Can 3D-printed displays be finished to look like real metal or wood?
Yes. Using metallic primers, cold-cast metal powders, or specialized painting techniques, skilled technicians can make lightweight plastic prints look like polished chrome, brushed bronze, cast iron, or natural wood grain.
How long does the finishing process take for large 3D displays?
Finishing time depends on prop size and detail. Simple logos or small prop stands usually take 2 to 3 business days to fill, sand, paint, and cure, while large multi-piece displays take longer.
What clear coat works best for outdoor 3D event displays?
Automotive-grade polyurethane clear coats with UV blockers are best for outdoor setups. They protect paint from sun fading, resist moisture, and prevent surface scratches during transport.
Key Takeaways
- First Impressions Count: Smooth, pore-free surfaces and clean edges ensure your event props look premium under direct venue spotlights.
- Disciplined 5-Step Process: Combining support cleanup, wet sanding, high-build priming, Pantone color spraying, and clear topcoats yields factory-grade results.
- Design for Finishing: Orient print files strategically and hide joint lines in CAD design to reduce post-processing labor and improve surface quality.
- End-to-End Execution: 3D2GoPH manages the entire production pipeline under one roof, delivering sturdy, professionally finished 3D-printed displays ready for your next big event.