Why 3D Printed Dioramas Are Redefining Miniature Model Making in the Philippines
February 2, 2026
How 3D Modelling Factory Machines are Used for Efficient Factory Design
February 5, 2026Manufacturing today moves fast. Parts are produced at scale, tolerances are tighter, and mistakes cost real money. That’s why many companies are turning to scanning systems for industrial firms to get clearer, more reliable data early in the process. Modern industrial scanning technology helps teams inspect parts, verify accuracy, and catch issues before they lead to costly rework.
Instead of relying solely on manual measurements or visual checks, industrial scanning provides manufacturers with a precise digital view of physical objects. That shift has changed how quality control is done across industries in the Philippines and beyond.
What Is an Industrial Scan Machine?
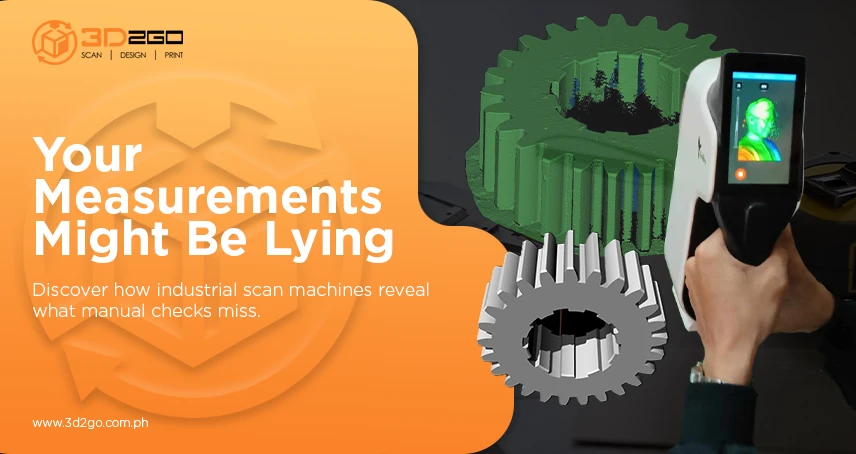
An industrial scan machine captures an object’s exact shape, size, and surface details using advanced scanning technology. It creates a digital 3D model that accurately reflects the real-world object.
These machines are commonly used in factories, engineering firms, and inspection facilities. They help teams analyze parts without touching or damaging them, which is especially useful for delicate or high-value components.
Unlike traditional tools like calipers or gauges, an industrial scan machine captures thousands to millions of data points in a single scan. This allows for a much deeper level of inspection.
Why Traditional Inspection Methods Fall Short
Manual inspection still has its place, but it comes with limits. Measuring complex shapes by hand is time-consuming and error-prone. Some features are simply hard to reach or measure accurately.
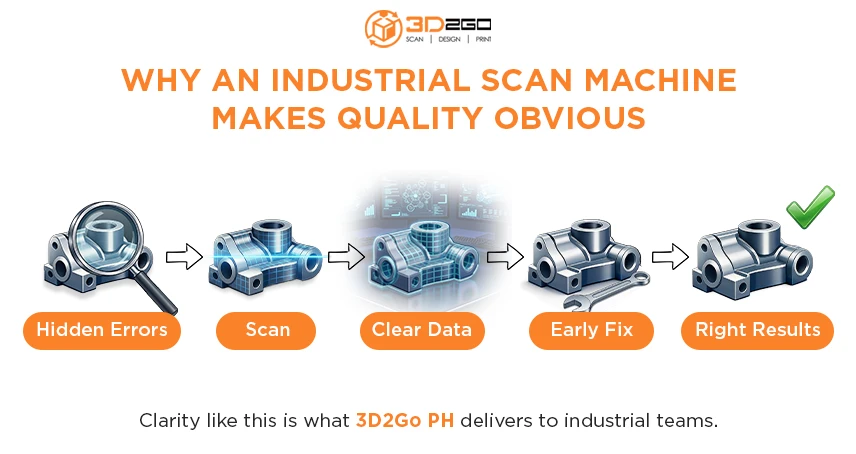
This is where an industrial scan machine becomes valuable. Instead of guessing or approximating, teams get exact measurements they can trust. The scan shows deviations, surface flaws, and alignment issues that might not be visible to the naked eye.
In industries where precision matters, relying solely on manual checks is no longer enough.
Improving Accuracy Without Slowing Production
One major advantage of using an industrial scan machine is speed. Scanning a part often takes minutes, while manual inspection can take hours.
Faster inspections mean production doesn’t have to slow down. Teams can scan parts at different stages of manufacturing to confirm that everything remains within tolerance.
This balance of speed and accuracy helps manufacturers meet deadlines without sacrificing quality.
Reducing Rework and Costly Errors
Rework is expensive. Fixing a problem late in production usually costs far more than catching it early.
With an industrial scan machine, issues are identified before they become serious. Misalignments, warping, or dimensional errors are clearly evident in the scan data. Engineers can make adjustments immediately rather than after hundreds of parts have already been produced.
Supporting Better Quality Control Decisions
Quality control isn’t just about finding defects. It’s about making informed decisions.
An industrial scanning machine provides clear, easy-to-understand visual data for engineers and inspectors. Instead of relying on spreadsheets full of numbers, teams see color maps that highlight deviations and problem areas.
This clarity improves communication between departments and helps decision-makers act faster and with more confidence.
Useful Across Multiple Industries
Industrial scanning isn’t limited to one sector. An industrial scan machine is used across many fields, including:
- Manufacturing and fabrication
- Automotive and aerospace
- Construction and infrastructure
- Tooling and mold inspection
- Equipment maintenance and repair
In each case, the goal is the same: accurate data that supports better outcomes.
Reverse Engineering Made Practical
Another important use of an industrial scan machine is reverse engineering. When original design files are missing or outdated, scanning allows teams to recreate accurate digital models from existing parts.
This is especially helpful for older equipment or custom components that are no longer in production. Instead of starting from scratch, teams scan the part and build from reliable data.
Non-Contact Inspection for Sensitive Parts
Some parts are fragile, soft, or easily damaged. Measuring them manually can cause wear or deformation.
An industrial scanner operates without physical contact. This makes it ideal for inspecting sensitive components, finished surfaces, or complex assemblies where touching the part isn’t practical.
The result is safer inspection without compromising accuracy.
How Industrial Scanning Fits Modern Workflows
Today’s production environments rely heavily on digital tools. CAD software, simulation, and automation all depend on accurate data.
An industrial scan machine fits naturally into this workflow. Scan data can be compared directly with design files, shared across teams, or stored for future reference.
This integration helps create a more connected and efficient quality control process.
Why Local Expertise Matters
While the technology is powerful, results still depend on how it’s used. Operating an industrial scan machine correctly requires experience, proper setup, and an understanding of real-world manufacturing challenges.
This is where working with a local provider like 3D2GoPH makes a difference. The focus stays on practical application, not just raw data.
When Accuracy Becomes a Competitive Advantage
In competitive industries, quality isn’t optional. Companies that invest in reliable inspection tools gain an edge.
An industrial scan machine helps businesses deliver consistent results, reduce waste, and build trust with clients. Over time, this accuracy becomes part of the brand’s reputation.
Where Precision Starts to Pay Off
Clear data leads to better decisions. Better decisions lead to stronger products.
If your team needs more accurate inspection, fewer surprises, and smoother quality control, professional scanning solutions can help. Learn how 3D2GoPH supports industrial projects with reliable scanning services.


